Snowmobile Seat Covers
Browse by Vehicle
-
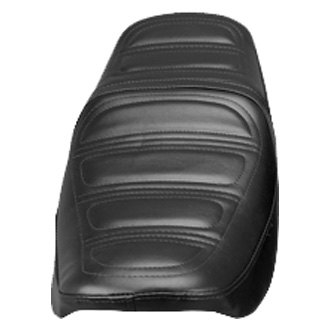 Saddlemen® - Replacement Seat Cover$67.81 - $168.48
 -
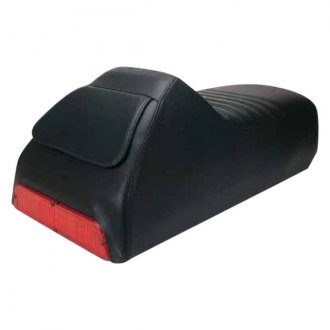 Saddlemen® - SaddleSkins™ Replacement Seat Cover$143.21 - $168.48
 -
-

-
-
-
-
-
-
-
-
-
-
-
-
-
-
-
-
-
-
-
-
-
-
-
-
-
-
Your winter adventures can take a toll on the appearance of your snowmobile seat, leaving it looking dull and shabby. An old and worn-out snowmobile seat not only ruins the aesthetic appeal of your sled, but also can compromise your comfort. Give your seat some care by outfitting it with one of high-quality seat covers offered in our online store. We cooperate only with the most reliable manufacturers in the industry to ensure all covers we stock provide the best possible quality and reliability. Designed for the specific make and model of your snowmobile, they conform to the original manufacturer’s dimensions and are guaranteed to fit perfectly.
Snowmobile seat covers showcased on our virtual shelves are made using highly durable vinyl materials to ensure exceptional resistance to low temperatures, fading, moisture, and other elements. They are proven to serve you for years to come, withstanding even the toughest winter conditions. Crafted with utmost attention to every detail, these seat covers look awesome. They will instantly restore the appearance of your snowmobile, making it look like it’s just rolled off the factory floor. Some seat covers also provide additional grip to further enhance your safety and comfort while on the go.
Replacing your cracked or torn seat cover is a relatively simple task provided you have the right tools and follow all instructions. To remove your old seat cover and install a new cover, you will need a flat-blade screwdriver, staple gun, staples, X-Acto knife or razor blade as well as several optional tools, including heat gun or hear dryer, adhesive spray, etc. The first step you have to do is to remove the seat from your sled. Then, take off the worn-out seat cover by prying up all staples with a small screwdriver and pulling them out using pliers. Make sure all staples are removed to prevent damage of the new cover.
You will also need to unhook the straps that hold the cover tight to the foam. Next, pull the straps through the seat bun and place the new cover so that all seams line up correctly. Remember that the corner seams on the cover should be positioned at the corner of the seat base. Now, you can start stapling. To get better results, it’s recommended to use a pneumatic or electrical stapler. And while it’s not impossible to operate a clumsy hand stapler while holding the cover in place, with an air-powered or electrical stapler you’ll do the job easier and with greater precision.
Center your seat cover at the front and tack the nose with a few staples. Then center the cover at the rear and put a few staples as well. With the cover held in this position, check your work to make sure logos, lettering, and seams are properly lined up. If everything is okay, fill in the blank spots keeping the seat cover under tension for a tight fit. For better alignment, you may need to put some extra staples in high-pressure areas. These are the basic steps to follow when replacing your seat cover, however, methods of installation may vary depending on the materials.